| .forgejo/workflows | ||
| docs | ||
| .gitignore | ||
| .terraform.lock.hcl | ||
| 00-provider.tf | ||
| 01-variables.tf | ||
| 02-projects.tf | ||
| 03-sw-appliances.tf | ||
| 04-vms.tf | ||
| cloud-init.yaml | ||
| README.md | ||
StrongSwan VPN Verification Guide
This guide helps you verify that a site-to-site IPsec VPN tunnel using StrongSwan has been successfully established between virtual machines provisioned via Terraform and configured with cloud-init.
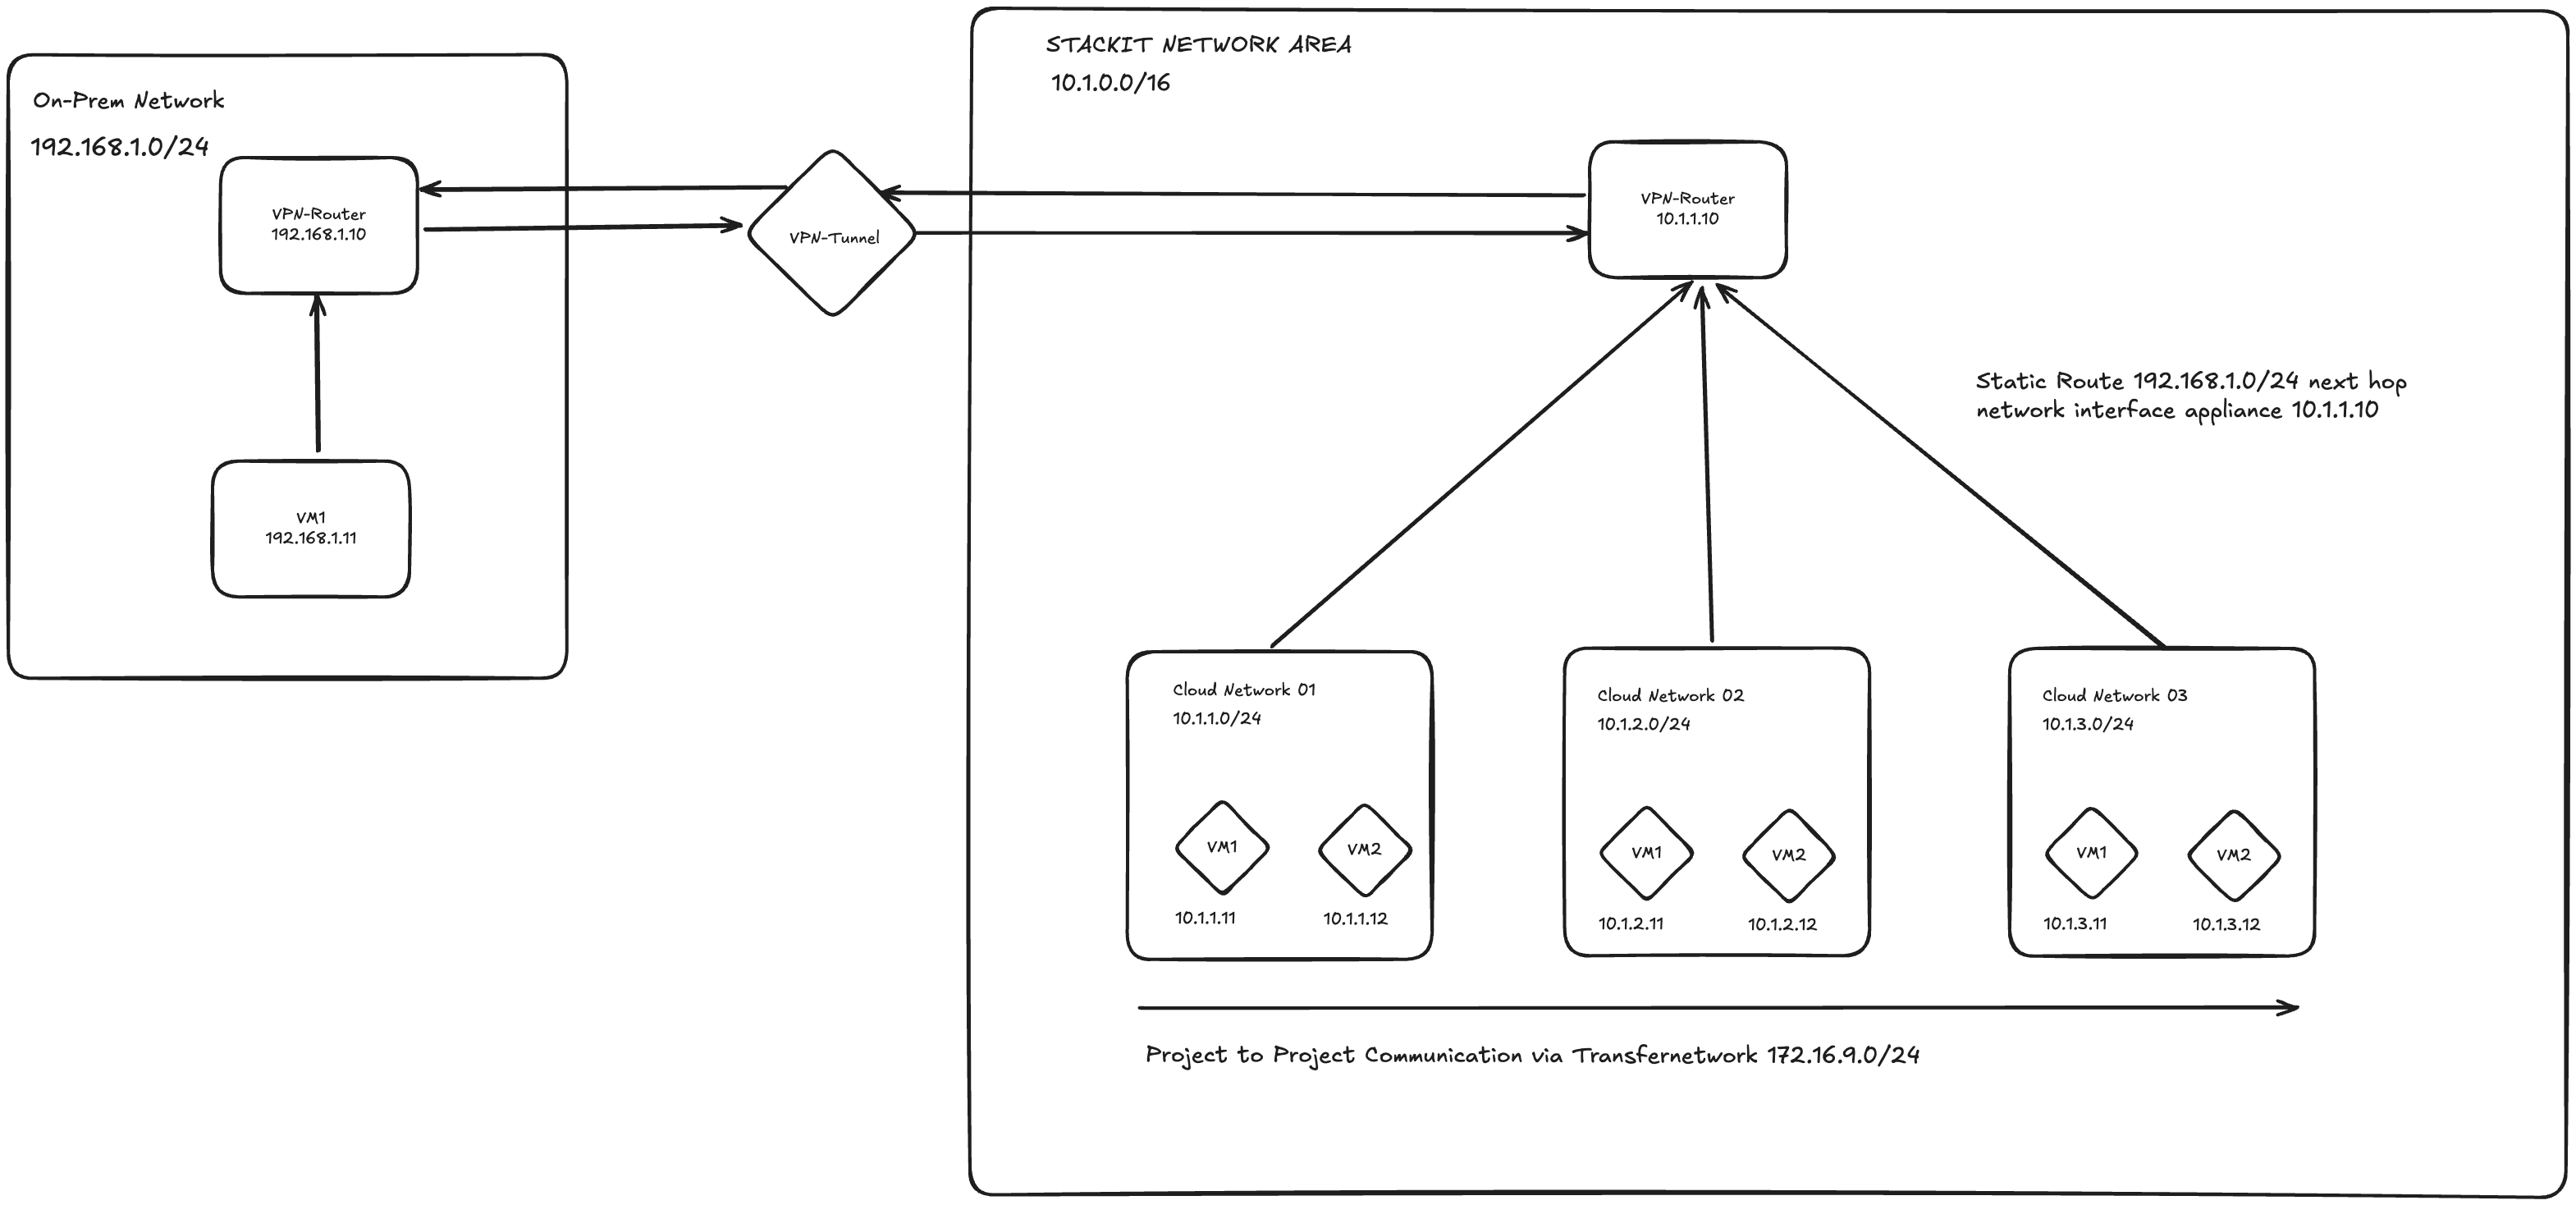
Hosts Overview
The tunnel uses IKEv2 with a Pre-Shared Key (PSK) and is automatically established at boot.
| Host | IP Address | Role |
|---|---|---|
| appliance01 | 10.1.1.10 | Cloud VPN Appliance |
| machine01 | 10.1.1.11 | Cloud Internal Machine |
| appliance02 | 192.168.1.10 | On-Prem VPN Appliance |
🔧 Architecture
1. Check StrongSwan Service Status
SSH into each machine using its public IP:
ssh -i ~/.ssh/id_rsa debian@<machine-public-ip>
Once logged in, verify the StrongSwan service:
sudo ipsec statusall
Expected output should resemble:
Status of IKE charon daemon (strongSwan 5.9.8, Linux ...):
  uptime: ...
  worker threads: ...
Connections:
     net-net:  10.1.1.10...192.168.1.10  IKEv2, dpddelay=30s
     net-net:   local:  [10.1.1.10] uses pre-shared key authentication
     net-net:   remote: [192.168.1.10] uses pre-shared key authentication
     net-net:   child:  10.1.1.0/24 === 192.168.1.0/24 TUNNEL
Security Associations (SAs) (0 up, 0 connecting):
  none
This output confirms the configuration is loaded, but the tunnel may not yet be active.
2. Bring Up the VPN Tunnel
If the tunnel didn’t start automatically, initiate it manually from either VPN appliance:
sudo ipsec up net-net
Then re-check the connection:
sudo ipsec statusall
You should now see an established connection:
Connections:
     net-net[1]: ESTABLISHED 15s ago, 10.1.1.10...192.168.1.10
     net-net{1}:  INSTALLED, TUNNEL, ESP SPIs: ...
     net-net{1}:  10.1.1.0/24 === 192.168.1.0/24
Key indicators:
- ESTABLISHED: Tunnel is active
- Subnet-to-subnet routing: 10.1.1.0/24===192.168.1.0/24
3. Verify VPN-Backed Network Connectivity
Ping between hosts to validate that routing is working through the VPN tunnel:
💻 From appliance01 (cloud) to appliance02 (on-prem)
ping 192.168.1.10
# ✅ Successful ping confirms VPN tunnel works
💻 From appliance02 (on-prem) to appliance01 (cloud)
ping 10.1.1.10
# ✅ Confirms bidirectional connectivity
💻 From machine01 (cloud internal) to appliance02 (on-prem)
ping 192.168.1.10
# ✅ Tests routing through VPN appliance (appliance01)
💻 From appliance02 (on-prem) to machine01 (cloud internal)
ping 10.1.1.11
# ✅ Tests project-project routing via SNA transfer network
❌ From machine01 (cloud) to appliance02 (VPN-disconnected)
If you remove the static route that directs 192.168.1.0/24 through appliance01:
ping 192.168.1.10
# ❌ Should fail, indicating that VPN appliance is required for routing
All success cases confirm correct tunnel and routing setup. Failures (when expected) validate routing dependency on the VPN stack.